◆PROCESSING 逆引きリファレンス
 カテゴリー:スマホ(AndroidMode)
フリック検知するには(AndroidMode編)
【概要】
PROCESSINGにAndroidMode を導入する事で、PROCESSINGで開発したプログラムをAndroid端末上で動かす事ができるようになります。
AndroidModeの導入については「PROCESSINGをAndroid端末で動かすには(4.0版)」記事を参照してください。
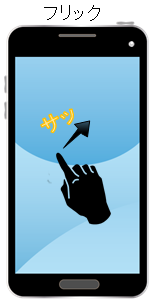
フリックとは指で画面をピッと弾くように、素早く動かして離す動作です。スワイプとの違いは、素早く動かすことと、最後に指を離す事です。文字入力操作などに利用しますよね。
 (画像URL:illust-AC 様:かみたまさん、amiyaoさん)
AndroidModeで画面のフリックを検知するには、surfaceTouchEvent 関数を利用します。
ただしsurfaceTouchEvent 関数だけでは、単純に指を動かされたのかフリックされたのかを判別するのが困難なため、Android SDKの GestureDetector クラスを利用して判別するのが便利です。
GestureDetector クラスの利用方法については「スワイプを検知するには(AndroidMode編)」記事を参照して下さい。
GestureDetector クラスの利用方法について、ポイントだけ紹介すると
- SimpleOnGestureListener を継承したクラスを用意する
- setup()関数で GestureDetector クラスを生成する
- surfaceTouchEventでGestureDetector のonTouchEventを呼び出す
といった処理を行うことになります。
SimpleOnGestureListener を継承したクラス内で onFling メソッドをオーバライドする事で、フリックを処理することができるようになります。
【詳細】
フリックイベント
フリックイベントboolean bl = onFling ( MotionEvent e1, MotionEvent e2, float velocityX, float velocityY ) ;
e1 : フリック開始座標(起点)
e2 : 現在のフリック座標
velocityX : 横方向の加速度
velocityY : 縦方向の加速度
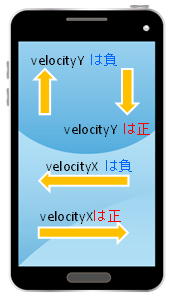
velocityX 、velocityY には縦横の加速度(1秒間あたりに移動するピクセル数)が渡されてきます。
このピクセル数が大きければ、それだけ早く指を動かした事になります。
velocityX 、velocityY は指を動かした方向により正負が異なります。
 (画像URL:illust-AC 様:かみたまさん)
onFling はある程度勢いをつけて指を動かし、その指を離した際に呼び出されます。ゆっくりと指を画面の上ですべらせるだけでは発生しない事に注意してください。
また onFling は、最後に画面をタップした指のフリック情報を通知してくるようです。
複数の指でフリックした場合、すべての指のフリック情報を onFling で検知する事はできません。
複数の指でフリックする操作を処理したい場合は、onScroll などのイベントを利用して、自力でがんばるしかなさそうです。
【関連記事】
- タップを検知するには(AndroidMode編)
- ダブルタップを検知するには(AndroidMode編)
- 長押しを検知するには(AndroidMode編)
- スワイプを検知するには(AndroidMode編)
- ピンチを検知するには(AndroidMode編)
- ローテートを検知するには(AndroidMode編)
- 様々なタッチ操作を検知するには(Ke:tai.lib 編)
サンプルプログラム
シンプルなフリックを検知する例:
|
1 2 3 4 5 6 7 8 9 10 11 12 13 14 15 16 17 18 19 20 21 22 23 24 25 26 27 28 29 30 31 32 33 34 35 36 37 38 39 40 41 42 43 44 45 46 47 48 49 50 51 52 53 54 55 56 57 58 59 60 61 62 63 64 |
import android.app.Activity; import android.content.Context; import android.os.Handler; import android.os.Looper; import android.util.Log; import android.view.GestureDetector; import android.view.MotionEvent; /** * Android Mode フリック Sample * @author MSLABO * @version 1.0 */ Activity act; //Activity Context con; //Context GestureDetector gestureDetector; //ジェスチャーOBJ //ジェスチャー検知クラス //SimpleOnGestureListener クラスを継承した専用のクラスを用意する class MyGestureListener extends GestureDetector.SimpleOnGestureListener { @Override public boolean onFling(MotionEvent e1, MotionEvent e2, float velocityX, float velocityY) { //フリック情報を取得する int pIndex = e1.getActionIndex(); println( "Start XY=("+e1.getX(pIndex)+","+e1.getY(pIndex)+")"); pIndex = e2.getActionIndex(); println( "Flick XY=("+e2.getX(pIndex)+","+e2.getY(pIndex)+")"); println( "Velocity XY=" + velocityX + "," + velocityY); return super.onFling(e1, e2, velocityX, velocityY); } } public void setup() { //フルスクリーン fullScreen(); //ActivityとContextを取得 act = getActivity(); con = act.getApplicationContext(); //UIスレッドのLooperと連携したHandlerを作成して //GestureDetectorに与える Handler mHandler = new Handler(Looper.getMainLooper()); gestureDetector = new GestureDetector(con, new MyGestureListener(), mHandler); } public void draw() { background( 200 ); } @Override public boolean surfaceTouchEvent(MotionEvent motionEvent) { //GestureDetectorにイベントを渡す gestureDetector.onTouchEvent(motionEvent); return super.surfaceTouchEvent(motionEvent); } |
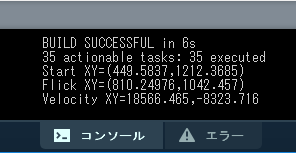
onFling でフリックイベントをキャッチして、フリック情報をコンソール領域に表示しています。
フリック方向を検知する例:
|
1 2 3 4 5 6 7 8 9 10 11 12 13 14 15 16 17 18 19 20 21 22 23 24 25 26 27 28 29 30 31 32 33 34 35 36 37 38 39 40 41 42 43 44 45 46 47 48 49 50 51 52 53 54 55 56 57 58 59 60 61 62 63 64 65 66 67 68 69 70 71 72 73 74 75 76 77 78 79 80 81 82 83 84 85 86 87 88 89 90 91 92 93 94 95 96 97 98 99 100 101 102 103 104 105 106 107 108 109 110 111 112 113 114 115 116 117 118 119 120 121 122 123 124 125 126 127 128 129 130 131 132 133 134 135 136 137 138 139 140 141 142 143 144 145 146 147 148 149 150 151 152 153 154 155 156 157 158 159 160 161 162 163 164 165 166 167 168 169 170 171 172 173 174 175 176 177 178 179 180 181 182 183 184 185 186 187 188 189 190 191 192 193 194 195 196 197 198 199 200 201 202 203 204 205 206 207 208 |
import android.app.Activity; import android.content.Context; import android.os.Handler; import android.os.Looper; import android.util.Log; import android.view.GestureDetector; import android.view.MotionEvent; /** * Android Mode フリック Sample * @author MSLABO * @version 1.1 */ //移動方向 final int L2R = 0x01; //左から右 → final int R2L= 0x02; //右から左 ← final int T2B = 0x10; //上から下 ↓ final int B2T = 0x20; //下から上 ↑ final int L2RT = 0x21; //右斜め上 ↗ final int L2RB = 0x11; //右斜め下 ↘ final int R2LT = 0x22; //左斜め上 ↖ final int R2LB = 0x12; //左斜め下 ↙ final int FIRE_DISTANCE_MAX = 1000; //イベント発火距離(MAX) final int FIRE_DISTANCE_MIN = 100; //イベント発火距離(MIN) final int FIRE_VELOCITY = 6000; //イベント発火加速度 Activity act; //Activity Context con; //Context GestureDetector gestureDetector; //ジェスチャーOBJ PImage Arrow; //画像 PVector nowPoint; //現在のフリック位置 PVector startPoint; //フリック起点 PVector velocity; //加速度 int degree; //回転角度 //ジェスチャー検知クラス //SimpleOnGestureListener クラスを継承した専用のクラスを用意する class MyGestureListener extends GestureDetector.SimpleOnGestureListener { @Override public boolean onFling(MotionEvent e1, MotionEvent e2, float velocityX, float velocityY) { //フリック情報を取得する int pIndex = e1.getActionIndex(); startPoint = new PVector( e1.getX(pIndex), e1.getY(pIndex)); pIndex = e2.getActionIndex(); nowPoint = new PVector( e2.getX(pIndex), e2.getY(pIndex)); int pId = e2.getPointerId(pIndex); velocity = new PVector( velocityX, velocityY ); return super.onFling(e1, e2, velocityX, velocityY); } } public void setup() { //フルスクリーン fullScreen(); //フリック情報初期化 nowPoint = new PVector(0,0); startPoint = new PVector(0,0); velocity = new PVector(0,0); //ActivityとContextを取得 act = getActivity(); con = act.getApplicationContext(); Arrow = loadImage( "arrow.png"); //UIスレッドのLooperと連携したHandlerを作成して //GestureDetectorに与える Handler mHandler = new Handler(Looper.getMainLooper()); gestureDetector = new GestureDetector(con, new MyGestureListener(), mHandler); //回転角度を初期化 degree = 0; } /** * 回転処理 * @param x 表示座標X * @param y 表示座標Y * @param img 画像 * @param deg 回転角度 */ void rotateImage( int x, int y, PImage img, float deg ){ pushMatrix(); //画像中央を回転の中心にする translate( x + img.width/2, y + img.height/2 ); //回転する rotate(radians( deg )); //回転の中心が画像中央なので、画像描画原点も画像中央にする //こうすると、(0,0)に配置すれば期待した位置に画像が置ける imageMode(CENTER); //画像を描画 image( img, 0, 0 ); //画像描画原点を元(画像の左上隅)に戻す imageMode(CORNER); popMatrix(); } public void draw() { background( 200 ); //画像表示位置を画面中央にする int dispX = (width - Arrow.width)/2; int dispY = (height - Arrow.height)/2; //移動方向を回転角度に変換する switch(getDirection()){ case L2R: degree = 90; //左から右 break; case R2L: degree = 270; //右から左 break; case T2B: degree = 180; //上から下 break; case B2T: degree = 0; //下から上 break; case L2RT: degree = 45; //右斜め上 break; case L2RB: degree = 135; //右斜め下 break; case R2LT: degree = 315; //左斜め上 break; case R2LB: degree = 225; //左斜め下 break; } //画像を回転する rotateImage(dispX, dispY, Arrow, degree ); } /** * 移動方向計算処理 * @return 移動方向 */ int getDirection(){ int dire = 0; //起点からの直線移動距離を求める float distanceLine = sqrt( sq(startPoint.x - nowPoint.x) + sq(startPoint.y - nowPoint.y) ); if( distanceLine > FIRE_DISTANCE_MAX || distanceLine < FIRE_DISTANCE_MIN ){ //イベント発火距離の範囲内でなければ、なにもしない return( dire ); } if( abs(velocity.x) < FIRE_VELOCITY && abs(velocity.y) < FIRE_VELOCITY ){ //イベント発火加速度に達していなければ、なにもしない return( dire ); } //移動量を計算 float distanceX = startPoint.x - nowPoint.x; float distanceY = startPoint.y - nowPoint.y; //X方向を検知 if( abs(velocity.x) > FIRE_VELOCITY ){ //X方向に一定以上素早く動いた場合 if( distanceX < 0 ){ //左から右 dire = L2R; } else { //右から左 dire = R2L; } } //Y方向はX方向の結果に加算する事で、斜め移動を検知する if( abs(velocity.y) > FIRE_VELOCITY ) { //Y方向に一定以上素早く動いた場合 if( distanceY < 0){ //上から下 dire = dire + T2B; } else { //下から上 dire = dire + B2T; } } return( dire ); } @Override public boolean surfaceTouchEvent(MotionEvent motionEvent) { //GestureDetectorにイベントを渡す gestureDetector.onTouchEvent(motionEvent); return super.surfaceTouchEvent(motionEvent); } |
onFling でフリックイベントから得た情報を、getDirection 関数で判別しています。
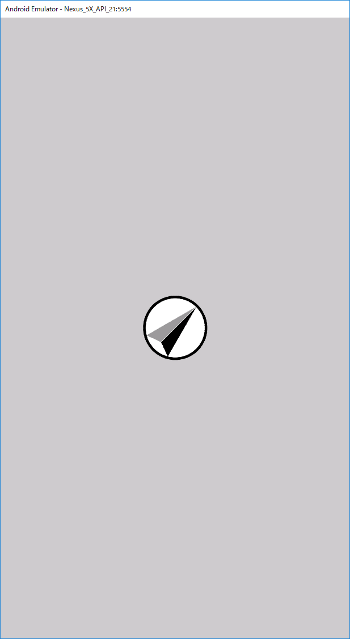
移動速度と移動距離から、上下左右斜め8方向のどちらに向かってフリックされたかを判定し、矢印画像を回転させます。
FIRE_DISTANCE_MAX、FIRE_DISTANCE_MIN、FIRE_VELOCITY の各定数値で反応感度を調整してください。
なお画像の回転方法については「画像を回転するには」記事を参照してください。
<出力サンプル>
 (画像URL:illust-AC 様:anny さん)
本ページで利用しているアイコン画像は、下記サイト様より拝借しております。各画像の著作権は、それぞれのサイト様および作者にあります。
